
Redmi K40 | Poco F3 | Mi 11X
Version
MIUI V13.0.7.0
Build
V13.0.7.0.SKHINXM
Download
# Rooting voids your device warranty.
All the Boot images, system files, mentioned on our site belong to the respective developers. We are not responsible if anything goes wrong with your device. Perform it at your own risk.
We provide stock boot images for most of the versions, make sure boot.img file version must match with your build number. if you flash wrong boot image, then your device will be brick!
How to Root Redmi K40 via magisk patched boot image
In this article, we will share the full instructions to download stock boot.img file, patch a stock boot image file using Magisk and then flash it via Fastboot commands on your Redmi K40 | Poco F3 (alioth). This tutorial is also for the newbies who never got root access on their phones.
Well, rooting your Android device is easier than ever before, but choosing the magisk is the perfect option. Magisk is a systemless root utility. This means that it roots your phone without modifying the system partition in the way that older root methods do. It is a most popular tool for rooting Android devices and installing custom modules to enhance Android’s functionality. How to install Magisk and root Android using Magisk? Don’t be so desparate, let me answer your questions in this article. Before you can install Magisk on your device, you have read the prequisite first, which are written below. So, we are going to show you how to root poco f3 using magisk patched boot file as a result you can easily have root access and do all the customization that you ever wanted. This guide is very straightforward. You just have to follow the steps carefully.
Download Poco F3 stock boot image
Pre-requirements
1. Fully charged phone.
2. Make sure your bootloader is unlocked.
3. Your device running on same build as given above.
4. Patience and sometimes brain.
Step 2: Create magisk patched boot image for Poco F3
1. Download boot.img for Redmi K40 | Poco F3 from above link.
2. Download latest magisk manager here.
3. Open magisk and Select Install in magisk as shown in the image below.
4. Now, click on select and patch a file
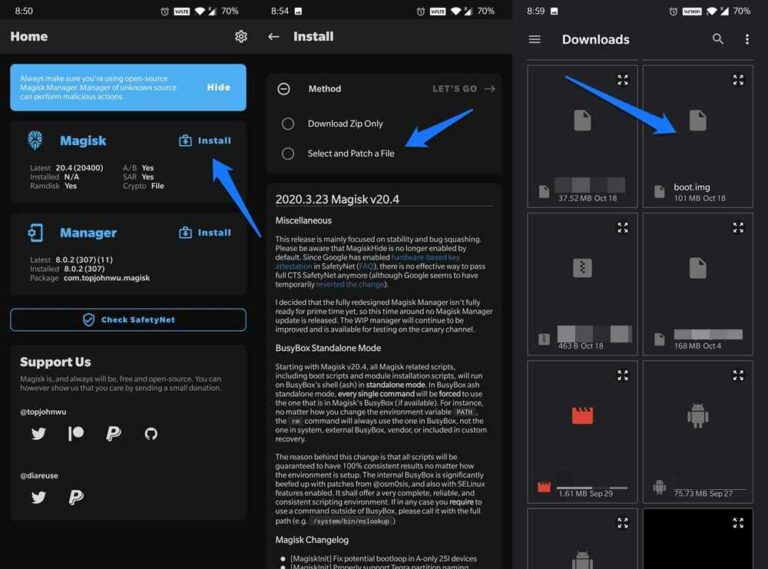
5. Navigate to your downloaded stock boot.img for redmi k40 file and patch the file.
6. Wait for the process to complete.
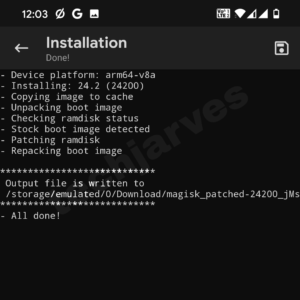
Now, magisk patched boot image for poco f3 ultra is saved in ‘Downloads‘ folder. That’s it for now lets move to next step.
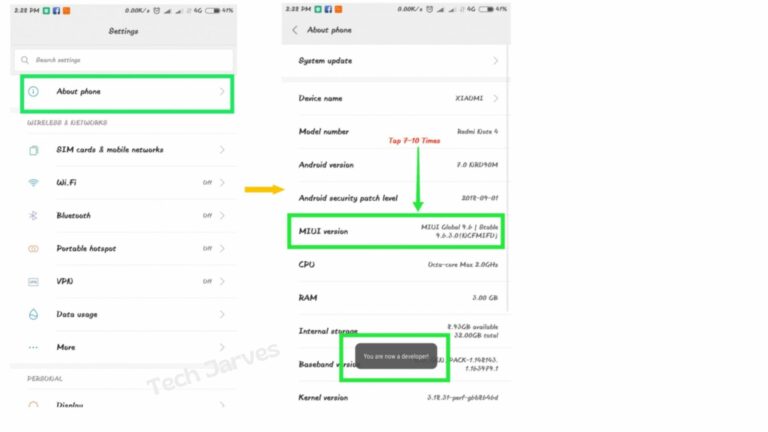
Step 3: Enable USB Debugging
USB Debugging option is the thing that you cant not skip if you want to root your device. Basically enabling usb debugging option is the first step in rooting process. It help in communicating the android device to the pc using adb commands. So, here is how to enable USB debugging on redmi k40 (alioth):
1. Navigate to Settings > About Phone > tap MIUI Version seven (7) times and a message will pop up “you’re in Developer mode“.
2. Go back to the previous page and tap on Additional Settings > Scroll down a bit > “Developer Options”.
3. In Developer options. Slide the “Developer Options” button to “On“.
4. Then scroll down the screen and turn on “USB debugging”. You will see a messages “Allow USB Debugging”, click “OK“.
Step 4: Install Adb and Fastboot drivers
To be able to control your device with USB debugging, you need to install ADB drivers on your computer. ADB and Fastboot drivers both have their different function but flashing magisk boot image require both the drivers. ADB drivers acts as a communication tool between your smartphone and PC while FASTBOOT drivers is used to modify the Android file system using a computer. Installing both the drivers is 15 seconds process, so here is how you can install adb and fastboot drivers on your pc:
1. Download latest adb setup tool in your pc from here.
2. Run the ADB & Fastboot setup as an administrator as shown.

3. A command prompt window will open with pre-written tasks.
4. Now, keep pressing “Y” and press enter untill next screen appers

5. Click Next and after the process click on Finish.
That’s it! you have now successfully installed the ADB and Fastboot drivers on PC. After installing the drivers if your PC is not recognizing your device then check the fix below.
Related:
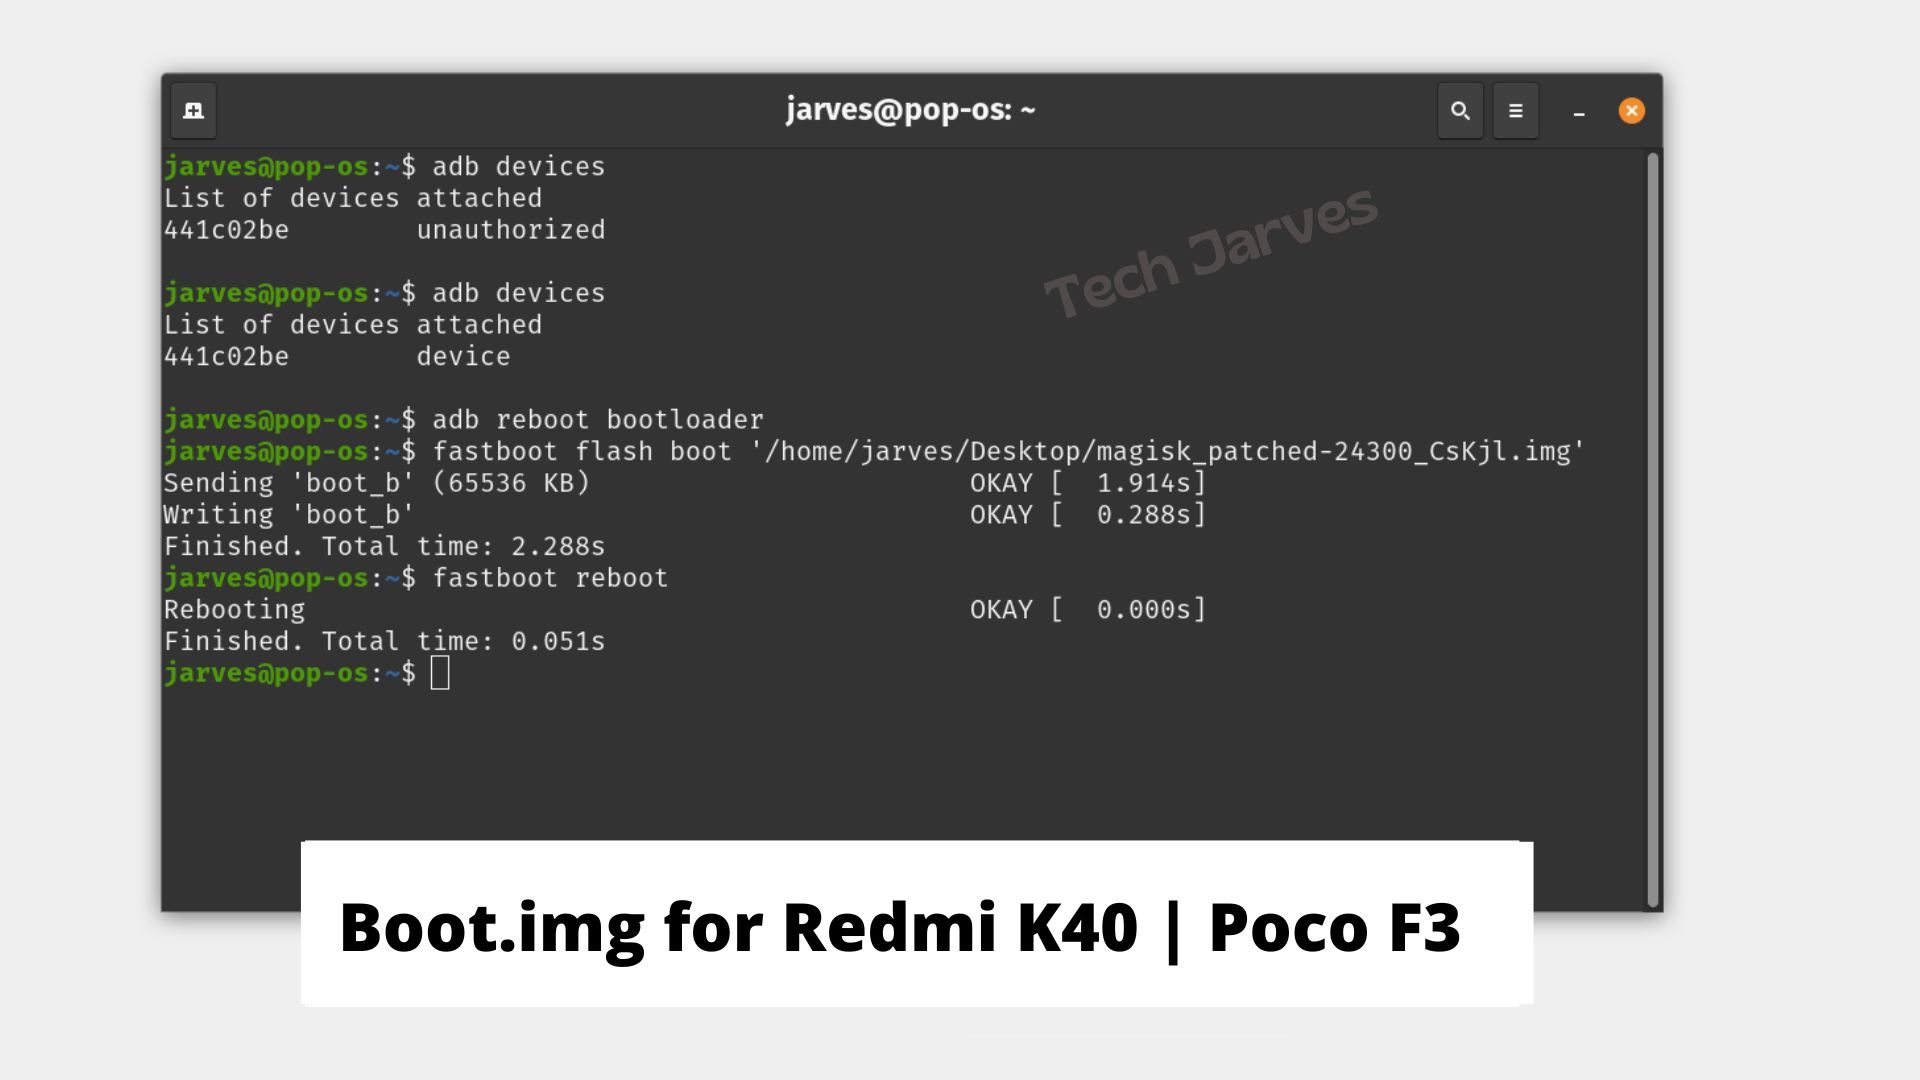
Step 5: Flash magisk patched boot | Root Redmi K40 | Poco F3 (alioth)
Finally, it’s time to root redmi 40 without twrp or any other custom recovery. As you have created patched boot image using magisk, so lets flash it using fastboot command. That’s why we installed both adb and fastboot drivers. First we need to boot the device in fastboot mode, so follow along
1. Connect your phone with the pc using USB cable and transfer the magisk patched boot image in your pc (you can paste in any folder you want).
2. Open the folder where you have transferred your boot image and rename magisk_patched.img to “boot.img” only.
3. Inside that folder, type “cmd” in address bar and hit enter. This will open a Command Prompt.

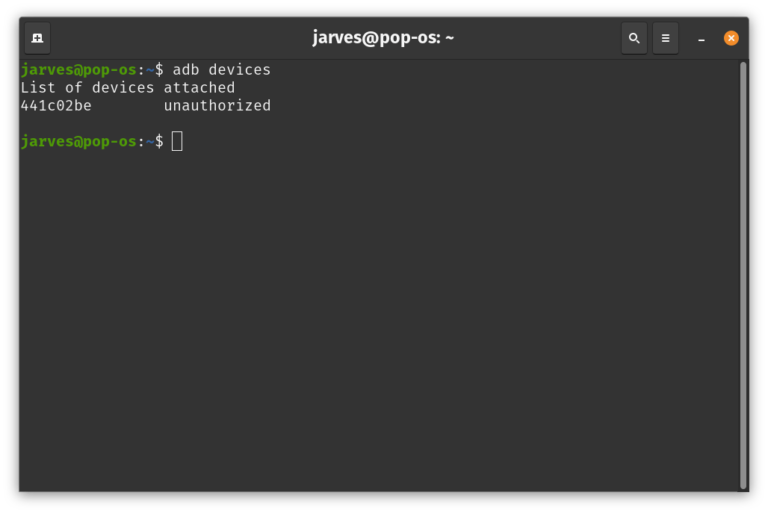
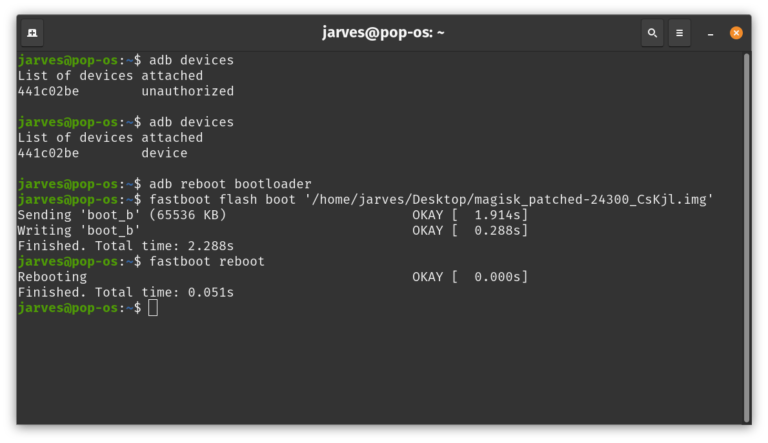
4. To test whether ADB is working properly, type the below command. If the device is shown as unauthorized, then watch the device’s screen for any Authorization message and allow the connection.
Note: Adb and Fastboot commands are same for both Windows and Linux.
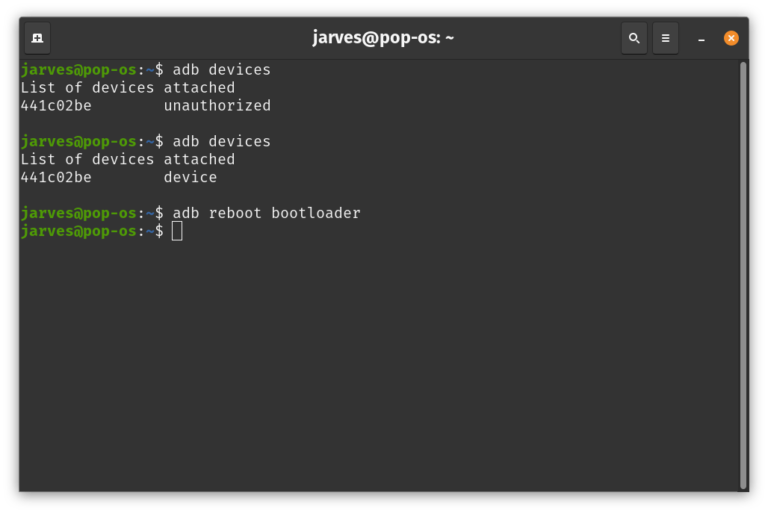
5. Now, type adb devices again to check your device is successfully connected in adb or not.

6. It’s time to boot the device into fastboot/bootloader mode. So type the below command.
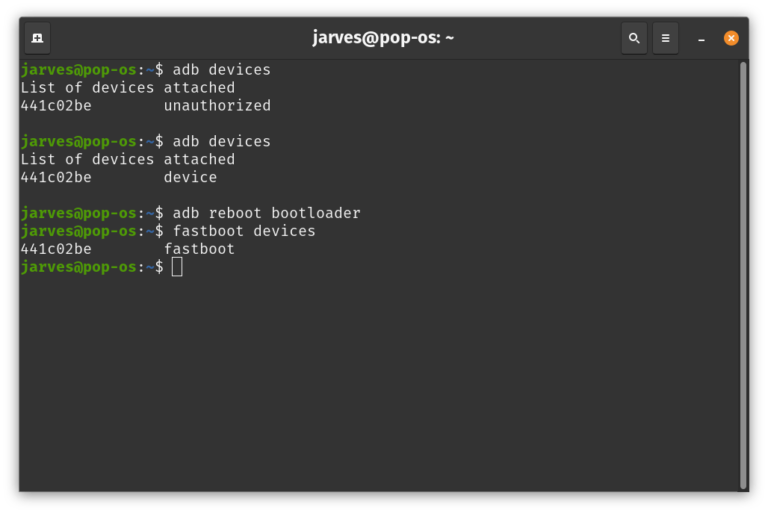
7. Now, type the below command to check device is connected in fastboot mode or not.
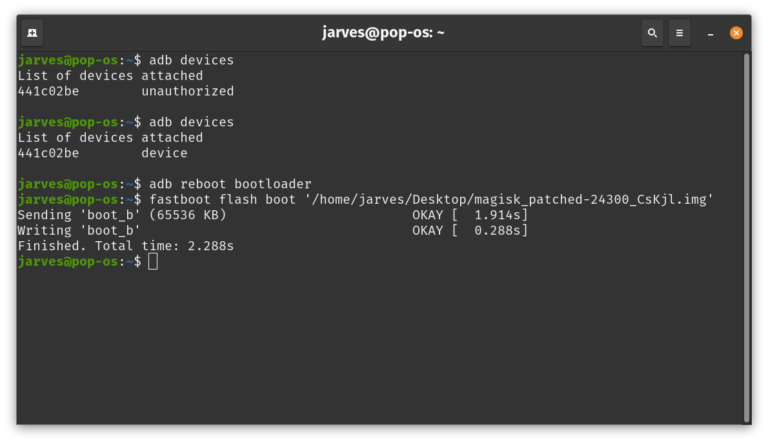
8. Now type the below command to install magisk patched boot.img in poco f3 alioth.
9. Magisk Patched boot.img is now flashed successfully, it’s time to reboot the device, so type the below command to reboot your device.
Booom, you have successfully rooted your device. After the device is rebooted, open magisk manager and first boot it may take time, no need to worry it’s normal. So this was the detailed guide on how to root redmi k40 using magisk patched boot image. So that’s it with this one, drop a comment if you are facing any issue during the rooting process. Our developers will definitely get back to you.
Boot.img for poco f3 isnt downloading
رجاء تحميل الملف
besooo387@gmail.com